
Understanding your controls for IHC and IF
Positive, Negative, Isotype and Secondary-Only Controls
In this webinar, we'll cover:
- Why do you need to run controls
- Highlighting the inherent variability in IHC and IF protocols
- How we perform and antigen and reagent controls
- Experimental design and best practice
- How to deal with autofluorescence in immunofluorescence experiments
Video Transcription
Hello everyone and welcome to our webinar on understanding your controls for immunohistochemistry, and immunofluorescence. My name is Rebecca Northeast and I am the technical specialist for Europe. I joined Proteintech in 2020, following a post-doc in metabolism and a Ph.D. in neuroscience from the University of Manchester. During my time in the lab, I performed many immunohistochemistry and IF experiments. I hope my experience combined with some Proteintech wisdom will help you to get the best from your experiments. This slide details an overview of what we will cover in this webinar. First, why do you need to run controls, highlighting the inherent variability in IHC and IF protocols, how we perform and antigen and reagent controls, experimental design, and best practice, and how to deal with autofluorescence in immunofluorescence experiments.
Introduction to Proteintech
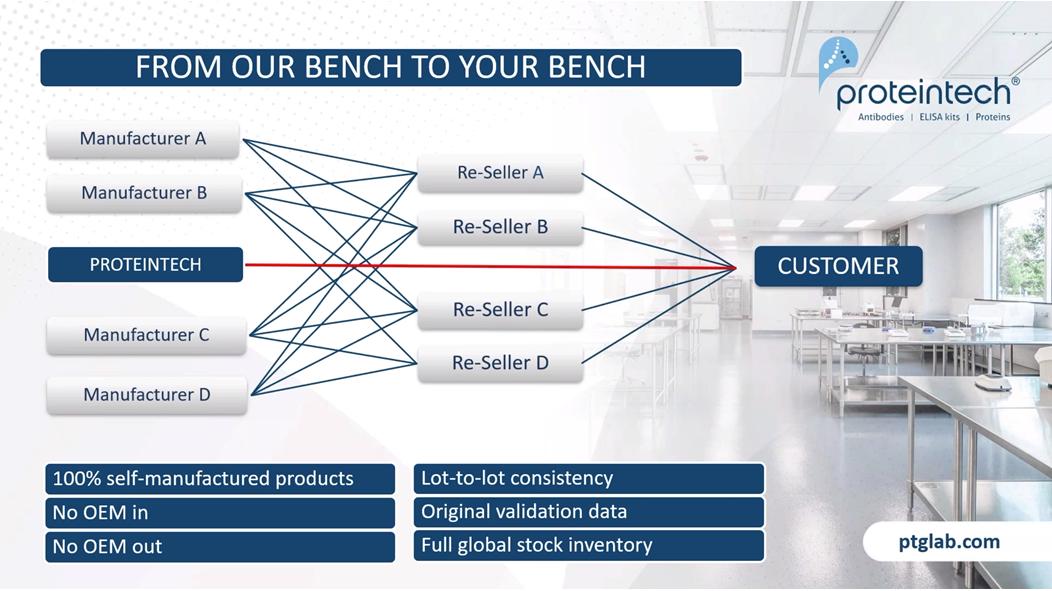
Most of you will probably already know Proteintech, but if you don't, here's our company introduction. We have been the original manufacturer of antibodies, Elisa kits, and proteins since 2002. We recently became ISO accredited, which means that we can manufacture GMP grade cytokines and growth factors for use in cell and gene therapies. With five global inventory sites, all of our products are in stock and available for next day delivery. The main difference between Proteintech and other antibody suppliers is that we manufacture every product ourselves and you can only buy our products with our label on it, by cutting out the middleman and not allowing anyone else to sell our products under their label, we offer you complete transparency. This means more lot-to-lot consistency because we can guarantee supply in addition to our huge library of original validation data direct from the lab with complete control over the quality of our antibodies, making sure it works in your hands.
Proteintech has polyclonal and monoclonal antibodies against 13,000 targets and within that, antibodies against two and a half thousand targets have had their specificity verified by KO/KD validation. This is the broadest coverage of knockdown/knockout validated antibodies in the antibody industry. This year we launched CoraLite fluorescent-dye antibodies for use in direct immunofluorescence and protein ladders for use in Western blots. As a company, we measure our success by your scientific success specifically, helping you publish impactful research faster. This graph shows that over our company history, our products are featuring in more and more publications each year. As of today, we have over 70,000 publications citations.
1. Why run controls?
Now moving on with the topic for today's webinar, why control is so important for antibody applications experiments, performing controls ensures that your results are biologically real, helps to minimize variables, and enables you to compare data with your own research and that of others. In a paper concerning controls for IHC experiments, he also states simply put an immunohistochemical assay that lacks controls cannot be validly interpreted, period. Essentially, this means that due to the nature of IHC experiments, we need to be sure that what we're observing is biologically real rather than a misinterpretation of artifacts or nonspecific binding. During my time in the lab, I encountered these questions to do with my own work and that of others. Questions such as, is this specific staining or just an artifact? Has my antibody not worked or has my treatment reduced target expression? How can I compare my results in my samples with that of previous students or that of a different lab from this cited paper? Is my microscope not working or is it the reagents or is it my sample? How do I know what is biological signal or what is autofluorescence and what are the answers to this? The answer is to perform the appropriate controls in order to understand what your results showing.
2. Highlighting the variability in IHC and IF protocols
Where is the variability in our IHC and IF experiments? Inherent variability occurs through things such as room temperature. So for example, the difference between the room temperature in summer and winter, and this will affect enzyme kinetics for H2O2 blocking, antibody binding, substrate reaction and chromatin development, essentially anything that requires an enzyme. Reagents have lot to lot variation, always make sure that you make a note of the lots that you use in each experiment so that you can check back if you get a different result in the future, as this could be due to a lot change. Human error can also cause variability, you get variability in exact incubation times and perhaps changes in application techniques. For example, did you come in later one morning after an overnight incubation? It is also possible to get variability through subjective assessments. This is particularly important with experiments that require a subjective assessment for chromogen development, such as DAB, and also any analysis of results. For example, counting activated cells. You can also get variability with pipette error. We add small amounts of antibody each time, so changes here make a big difference in concentration and always ensure that your pipettes are serviced and calibrated regularly.
I'm not going to go over the whole protocol here, but briefly, in immunohistochemistry, the main sources of variability in your results are in steps, such as blocking, primary antibody incubation, secondary antibody incubation, and DAB development. These steps contain the most variability through things such as changes in room temperature, incubation times, and buffer composition. And by performing controls, we can help to compare within our own results to account for these variables.
The immunofluorescence protocol, we see variation in similar steps to the IHC protocol as mentioned before. With IF, we also get added variability due to permeabilization of tissue. For example, changes in the permeabilization time or slight changes in the concentration of our permeabilization agent will control how much antibody can reach intracellular targets. Also with IF, we have fluorophores connected to our secondary antibody. The use of fluorophores conjugated to our secondary we'll have inherent differences in the amount of light exposure during sample preparation and also microscope analysis, which would in turn affect the brightness of death of the fluorophores and potentially change results.
3. Antigen and reagent controls
Now, I shall move on to discussing what controls you need to run and why. The first set of our reagent controls, we need to detect that the observed signal is specific for a target. And in order to do that, we can first run aside, which has been processed in exactly the same way but the primary antibody has been removed from the incubation buffer. Ensure that we still add the other reagents to the buffer and incubate alongside the other sides. Then we will add our secondary antibody as normal and visualize the sides. If you're running a multiplex immunofluorescence experiment, ensure that you do this separately for all your secondaries, this control is highly important and ensures that the observed signal is biologically real for your target rather than just non-specific staining of your secondary antibody. The endogenous control is where you omit the primary and secondary antibodies from the buffers in both of these steps. Ensure that your sample is processed in exactly same way as this will reveal the level of autofluorescence in your sample, which can easily be mistaken for specific staining. I will later cover how to deal with autofluorescence in this talk. One further reagent control is the isotype control. This is where you replace your primary antibody with that of the identical isotype such as this one for Polyclonal antibodies. The change here is that this antibody is non-immune and therefore the Fab portion will not bind to any specific epitope in your sample. Ensure that the concentration of your isotype control antibody is the same and is run at the same time as your main experiment. It's also preferable if you buy your isotype control from the same supplier as your primary antibody. This is a more sophisticated version of the no primary control as it can also account for any FC mediated binding by this antibody and any non-specific primary antibody binding in your sample.
In order to ensure that our results are valid, it is highly important to run antigen controls alongside our experiments as well. This is especially important when trialing new antibodies or new cell lines and tissues. Running a sample is a positive control is one that we know expresses the target antigen will ensure that our protocol is working, and also validates any negative results. You can find potential positive controls through researching the literature or by using overexpressed genetic cell lines for your target protein.
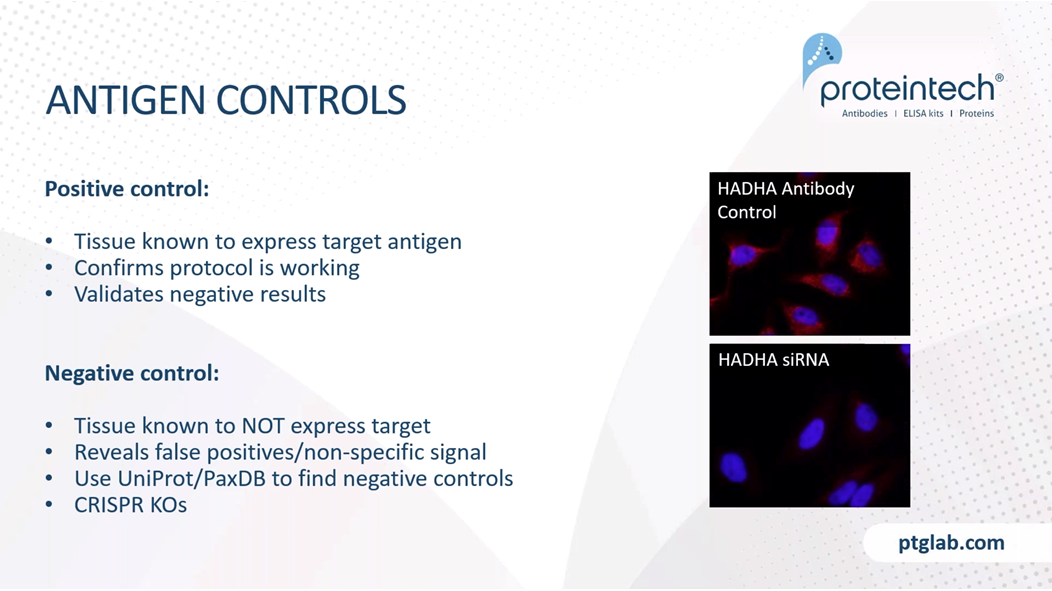
Your negative control should contain tissues or samples, known not to express the target such as this cell line, which has had siRNA knockdown of HADHA, which greatly reduce signal for this antibody specific to HADHA. This will reveal false positives or non-specific signals due to non-specific antibody binding. Uniprot or PaxDB to help find negative controls. In addition, CRISPR KOs can also be used to knock down your target protein.
Where possible, the full set of controls should be run alongside each experiment. However, this is sometimes not possible due to sample limitations or constraints to the number of samples that you can run at once. However, it is most important to run a full set of controls when trialing new sample types, such as a different cell line or tissue, new antibodies or reagents or new stock of reagents, if your lot number changes, this is especially important for things such as polyclonal antibodies. Due to the nature of polyclonal antibodies, a different lot will mean that it will recognize a different combination of epitopes and therefore, and could therefore produce different results. You also need to run controls when rerunning an experiment to increase N numbers for example. Most importantly always run your controls at the same time as your main experiment slides. This means that the buffer composition incubation times and the room temperature will be exactly the same and say, we'll remove multiple levels of variability.
4. Experimental design best practice.
Here's an example of a slide set of an experiment, plus a full set of controls. The main experiment should include all our main experimental groups, however many slides that may be. And your control should include your antigen controls, therefore a positive and negative target expression sample. And your reagent controls should be that of Endogenous tissue where you have no primary and no secondary antibody. Your secondary only controls where you emit the primary antibody that includes your secondary antiquity, which you ran for each fluorophore, as well as your primary antibody isotype controls. If you're pushed for reagents, space in your staining setup, or have limitations due to precious tissue, the two controls that you must always run are the endogenous and secondary only controls. These will help to account for the majority of non-specific staining and any autofluorescence that you might have in your sample.
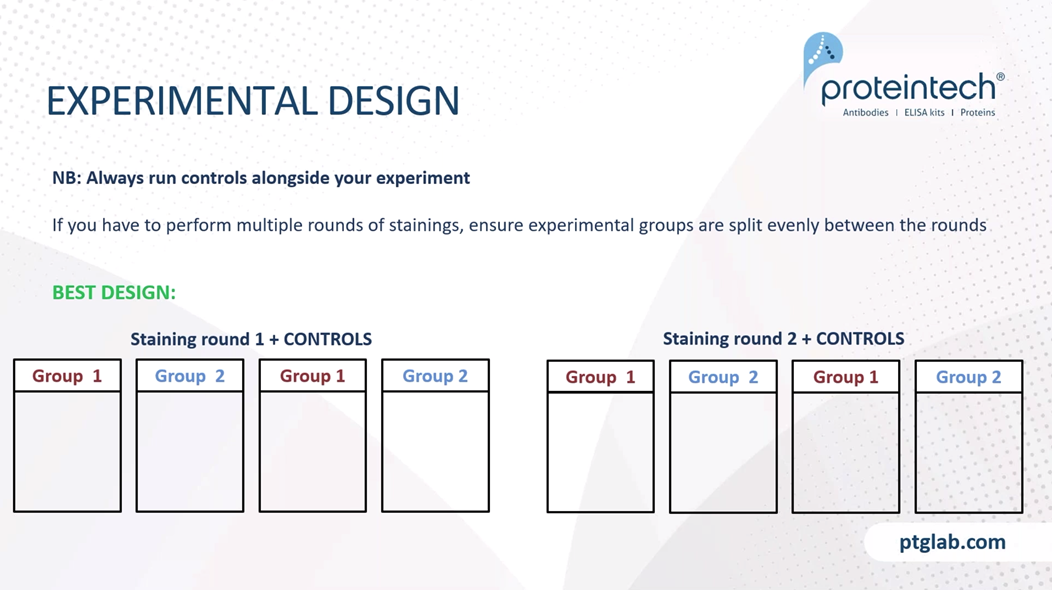
As stated, always run your controls alongside your main experiment. If you have to perform multiple rounds of staining due to space constraints in your experimental setup, ensure that your experimental groups are split evenly between the rounds. So this is for example, a best design if you have two groups of experiments. So this here is the best design if you have two groups within your experiment. So if you're staining round one, we will have our controls plus an equal mix of participants from group one and group two. And in staining round two, again, an equal mix of group one and group two. This is a poor design because we are not able to state the results we are seeing when they are split between group one and group two are due to biologically real data, or just due to changes in the inherent variables that you get within each staining round.
At Proteintech, we have recently launched our range of CoraLite conjugated antibodies. These will help simplify your immunofluorescence protocol as performing direct immunofluorescence without popular CoraLite conjugated primary antibodies will reduce the need for secondary antibodies and prevent any non-specific binding in your sample that might occur due to the nature of secondary antibodies.
5. How to deal with autofluorescence
The last topic to discuss today is autofluorescence. Autofluorescence is due to the background fluorescence in a tissue, which is not attributed to specific antibody-antigen binding. As you can see in this FFPE, which is formalin-fixed paraffin-embedded, human kidney tissue under the green wavelength of 550 nanometers, you can still see some defined biological characteristics in this sample. However, this is just a completely unstained sample. We get autofluorescence due to formalin fixation causing fluorescent aldehyde adducts. Red blood cells, which contain the fluorescent compound heme, collagen, which is fluorescent as well. And some metabolic compounds such as NADH, which also have natural fluorescents. So how do we fix autofluorescence or how do we minimize its effects? One way to do this is to always include an endogenous staining control so that when we're looking at our sample, we can tell what is pure autofluorescence and what is biological signal. Most autofluorescence occurs in the green spectrum. So as we can see here in the previous picture too before when taken under the green filter versus the red filter, you can see a lot more defined biological characteristics under the green filter and under the red filter, therefore the autofluorescence is already naturally decreased under this filter. And in keeping with that, use of red and far-red fluorophores, such as the CoraLite594, or a CoraLite647 fluorophore will help to minimize this effects straight away. In another way that we can help reduce autofluorescence is to only fix our samples for the minimum time required and also to perfuse the PBS to remove any red blood cells and the natural fluorescent compound heme. Popular commercial reagents, such as True View, also help reduce any or fluorescents if applied prior to staining.
The take-home message from this talk is that controls a vitally important in antibody applications to ensure the validity of our results. Research which controls the best for you and your experiment and that's application always run controls alongside your experiment, be critical of your antibody supply, and ensure that they have properly validated the antibody before it reaches your hands and can show their original data. Here's some helpful resources in order to get you finding the best controls for your experiment. So sites such as UniProt impacts DB will help you look up protein sequences and also protein expression in different tissues, as well as the Proteintech website, which contains applications specific tips and tricks and product-specific protocols for you to follow. Thank you for listening. Feel free to contact me on rebecca@ptglab.com, have a good day.
Able™