Summary
- Co-IP pulls down a "bait" protein (like GFP-tagged) and its "prey" interaction partners using antibodies or Nanobodies conjugated to beads.
- The workflow includes preparing cell lysate, incubating with bait-specific beads, washing away unbound proteins, eluting the complex, and analyzing by Western blot or mass spectrometry.
- Essential steps are lysis buffer optimization and protease inhibitors to preserve protein interactions while preventing degradation.
- Positive controls confirm bait pulldown works; negative controls (prey alone or tag alone) rule out non-specific binding.
- Controls are crucial to validate specific bait-prey interactions and avoid false positives or negatives.
Introduction to Co-IP
Immunoprecipitation (IP) is a technique used to isolate a protein from of an extract using a Nanobody or antibody (Ab). In co-immunoprecipitation (Co-IP), besides the IP of a specific protein, its interaction partner(s) are also pulled down and analyzed. In Co-IP, the protein that is pulled down is called the “bait” protein, while the interaction partner is called the “prey”. In Co-IP, the bait is directly precipitated with a Nanobody or Ab, which is coupled to (magnetic) beads. The prey is indirectly precipitated together with the bait. Therefore, Co-IP is used to enrich and/or identify interaction partners of the bait protein.
In the following blog, we focus on the precipitation of a GFP-tagged bait and its interacting prey protein. The Co-IP is conducted with GFP-Trap® comprising an anti-GFP Nanobody conjugated to beads. However, the principles described in this blog also apply to tags other than GFP or for Co-IPs using conventional antibodies.
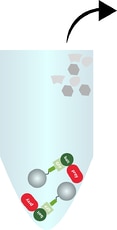
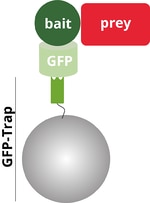 The GFP-bait is a fusion protein of GFP (light green) and bait protein (dark green). The bait interacts with the prey protein (red). During Co-IP binds the added GFP-Trap® to the GFP bait..
A Co-IP consists of 5 steps.
The typical steps of a Co-IP are:
1. Preparation of the cell lysate
The preparation method of the cell lysate depends on the organism and bait and prey protein.
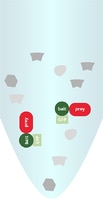 Soluble components after cell lysis
2. Binding of the bait and prey by GFP-Trap®
GFP-Trap® is added to the cell lysate and incubated for 1 h at +4°C.
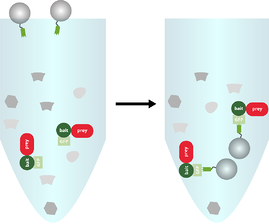
3. Washing off unbound molecules, prey should remain bound to bait
The beads are washed a few times to remove unbound molecules while the prey protein should remain bound to the bait protein.
4. Elution of bound bait and prey from the beads
Bait and prey protein are released from the beads using SDS-sample buffer or acidic elution buffer.
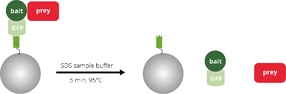
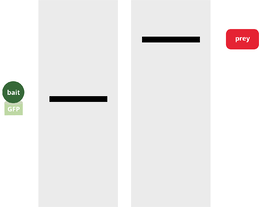
5. Analysis of bait and prey on SDS-PAGE, Western blot, or by mass spectrometry
The eluate containing the bait and prey proteins is analyzed by SDS-PAGE, Western blot (WB) or mass spectrometry (MS).
Controls are crucial for a successful Co-IP experiment
Controls are an essential part of any Co-IP experiments – they are very important for the interpretation of your results and can help you to identify potential problems. In our Co-IP example, three different components should be analyzed: the bait-GFP, prey, and GFP only. Please note that a loading control is also often analyzed in addition, e.g., GAPDH, which is not shown here. In a comprehensive Co-IP experiment, different combinations of the components are usually examined to avoid false positive and false negative results.
1. Positive control
The positive control consists of a pulldown of the GFP-bait protein and GFP protein in the absence of the prey protein. GFP-bait and GFP are supposed to be found in the input and bound (IP:GFP) fractions. This experiment is conducted to confirm that the immunoprecipitation of the GFP-bait protein works under the chosen conditions, which is a pre-requisite of every Co-IP.
2. Negative control
The negative control consists of a pulldown of the prey protein in the absence of the bait protein. If the bait protein contains a larger tag like GFP, often a second pulldown is conducted with the prey protein and the tag only. The negative control experiments should confirm that the prey protein is not precipitated in the absence of GFP-bait or if only GFP is present. The prey protein is supposed to be present in the input fraction but not in the bound fraction.

3. Co-IP experiment
If the positive control and negative control experiments show the expected results, the final Co-IP experiment can be conducted. In the final experiment, both the GFP-tagged bait and prey protein are incubated together in the input. If the prey and GFP-bait are both found in the bound fraction, it can be concluded that the prey is only precipitated if the bait protein is present. This experiment, along with the positive and negative controls, demonstrates that the prey and bait proteins interact with each other.
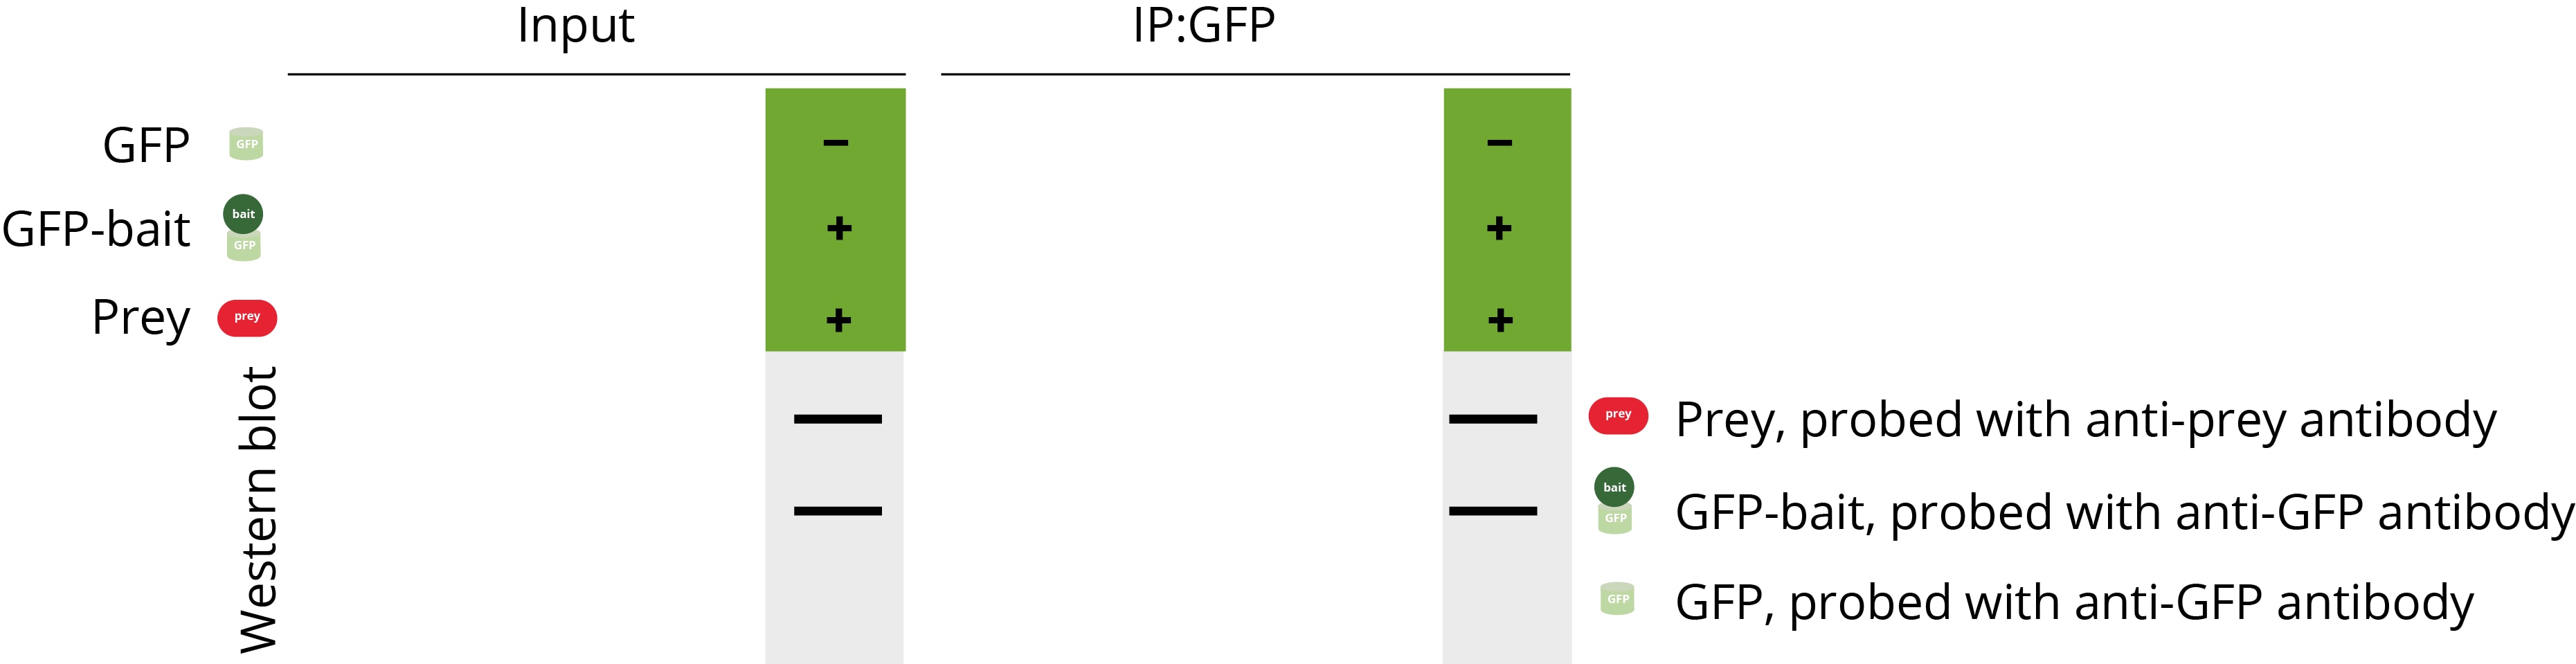
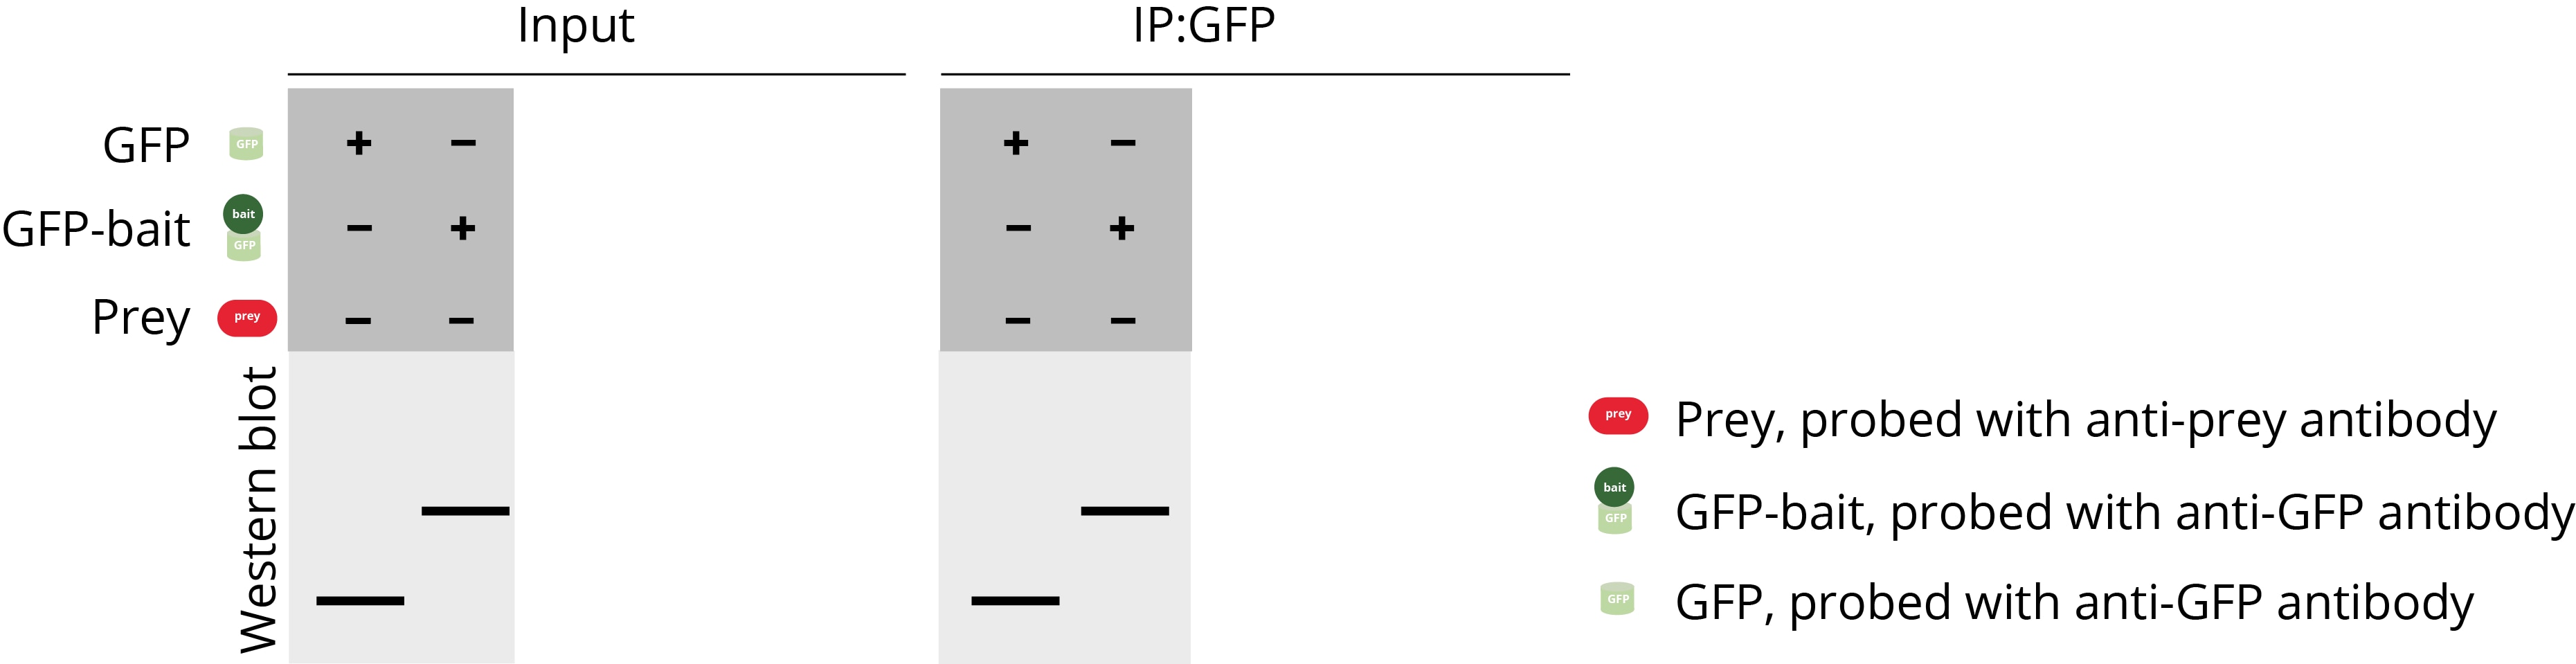
A complete Co-IP experiment consists of all three parts. In publications, typical Co-IP data looks like this:
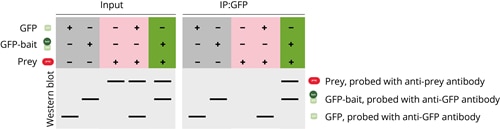
Controls are essential for meaningful results. Only by looking at all controls can you identify and resolve issues such as no pulldown of the prey or unspecific pulldown of the prey protein to avoid false results.
FAQs
FAQs written by Lily Thompson, Graduate Student at Thomas Jefferson University.
What is a Co-IP?
In Co-IP, a protein of interest along with its interaction partners are isolated from a lysate. The protein of interest that is pulled down is called the “bait” protein, while the interaction partners are called the “prey.” The bait is directly precipitated with an antibody or nanobody, which is usually coupled to agarose beads that can be spun down or isolated with a magnet. Since the prey proteins are interacting with the protein of interest, they are indirectly precipitated together with the bait. Thus, Co-IP is a way to test whether certain proteins interact with each other inside the cell.
What are the steps in a Co-IP?
There are five key steps to Co-IP:
- Preparing the cell lysate: Lyse cells to release proteins.
- Binding the bait and prey: Adding antibody against the target protein.
- Washing off unbound molecules: Removing non-specific binders.
- Eluting bound bait and prey: Releasing the complexes from the beads.
- Analyzing bait and prey: Downstream analysis via Western blot, SDS-PAGE, or mass spectrometry.
How do I choose which antibodies to use for my Co-IPs?
If you're pulling down endogenous protein directly, choose an antibody that has been validated for IP by the supplier. Additionally, you should consider where the antibody binds to your bait to avoid blocking the binding site of your prey protein. Consider using Proteintech’s 3D epitope viewer to get insight into antibody binding sites.
If your bait protein is tagged (e.g., GFP, FLAG, HA, etc.), you can use a tag antibody or nanobody, which are usually well characterized and optimized for IP.
Should I tag my protein of interest or use an antibody against it for co-IP?
There are advantages and disadvantages to both. Tagging is a better option if no reliable IP-grade antibody exists for your protein of interest, or the endogenous protein is low in abundance. Additionally, optimization is usually easier with antibodies against tags and generates reliable and reproducible results. Downsides are that overexpressing your protein of interest can lead to false interactions, and it is not fully physiological.
Using an antibody against the protein (endogenous Co-IP) is better if physiological interactions are important and you don't want overexpression artifacts. Some disadvantages, however, can be higher background, more optimization required, and a higher amount of starting material (cell lysate) may be needed.